I used to do all my assembly work on a workbench that had a double-layer plywood top. At the time of building that workbench, I had never heard of a torsion box workbench. The old plywood top lasted for years and along the way, I noticed that it was not as flat as I once thought it was. I would like to believe that when I originally built it, it was nice and perfect. But who really knows. I don’t for sure since I threw it together pretty quick one night when I needed some additional workspace for building wooden toys, which was my hobby at the time.
So fast forward to today. Now that old plywood workbench has turned into my main bench with drawers, but I don’t do final assembly there for my furniture. I need a good flat, level top for that. And that’s where the torsion box workbench comes in. I originally got the idea from Marc over at The Wood Whisperer, which is also where I learned what a torsion box is. So I drew up some quick plans, built one myself, and here it is:
The box was constructed with 1/2″ MDF, 3/4″ birch plywood, and hardboard. The base is built from dimensional lumber I had lying around. I also incorporated some wheels that lock in place by lifting up on each side, then they get released by pulling on a string. The idea came from Norm Abram, in a New Yankee Workshop video I watched on Youtube. By the way, if you’re into woodworking, Norm is freakin’ awesome!
Building My Torsion Box Workbench – The Process
How I build a quick workbench base for cheap
So I built a simple base out of 2x4s and I beefed it up a bit with some decking boards I had laying around. As you can see its mostly screwed together. I doubled up on the legs to add weight and sturdiness. Plus that allowed me to notch the inner 2-by and get a tight fit while allowing the top to rest on top of the legs.
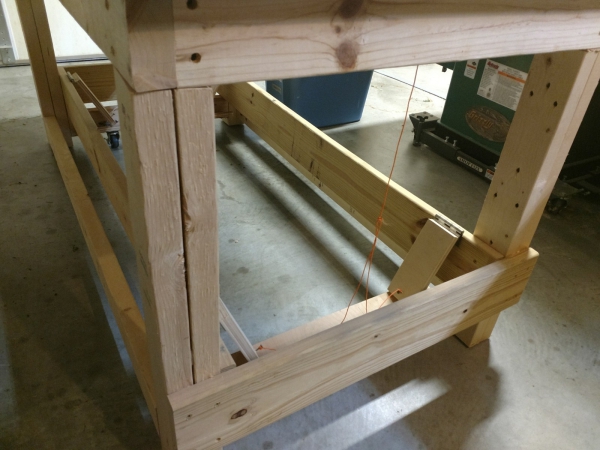
The lower stretchers were originally just 2x4s attached with pocket screws. This may have worked, but it didn’t feel sturdy enough for my liking. Plus, I’m a big fan of heavy furniture, especially in the shop. I don’t like to lean on or bump into a workbench and it slide 6 inches across the floor. I want my furniture stationary and solid.
So I added the deck boards as additional stretchers to beef it up. These I added to the inside of the legs on the long runs, and the outside of the legs on the short runs. This way I could just screw the boards into the legs without any serious modifications to my plans. These stretchers also allowed me to better incorporate the auto-drop wheels feature I mentioned above.
Really cool auto-drop wheels for a torsion box workbench
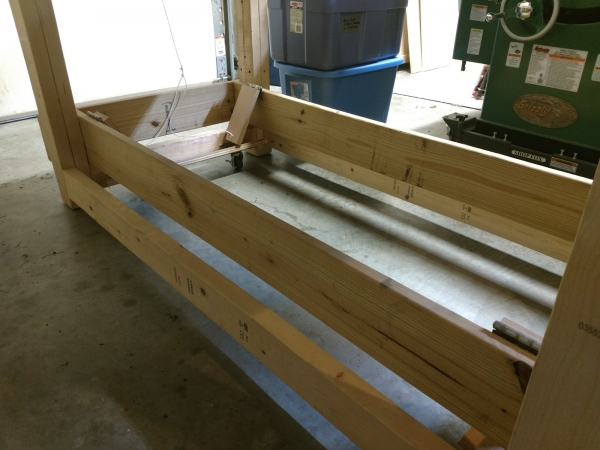
So with this setup, I can lift up one end, and the wheels drop in place. They automatically lock down, holding the feet of the base just off the floor. Then I walk around and lift the other side, locking in those wheels. One side I have stationary casters, the other side I installed swivel casters. With this, I can now easily push my workbench around the shop on the wheels.
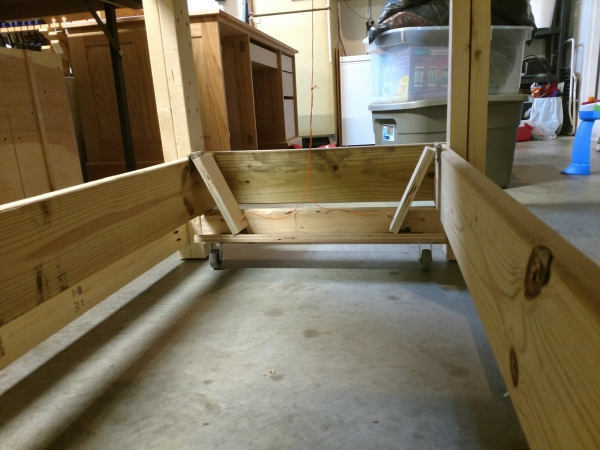
This works with a series of hinges, casters, and pieces of 3/4″ plywood. See this picture here, it shows the bench down on its feet, with the wheels resting on the floor.
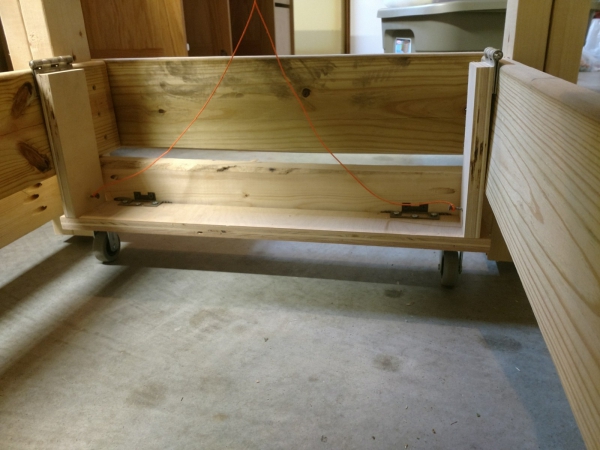
As you lift up the end of the workbench, the long piece of plywood with the casters lowers down. Then the 2 short pieces of plywood drop down and lock the long plywood in place. This was installed precisely so the feet would come off the floor 1/2″, leaving all the weight of the workbench on the casters alone, allowing me to roll it around with ease. Here’s with the caster locked down:

And as you can see in the picture, I also added adjustable feet to the bottom of the legs, just so I can make sure the base was nice and level before building the top, which I will now get into.
Constructing the torsion box for the workbench
Once the base is constructed and I’ve got it nice and solid, first I want to make sure the top of the base is really flat, and level. I use my long straight edge steel rule to gauge this. I’ll add shims or plane some material from the lumber to make sure it’s a perfect base, on which I can then build the perfect top.
So when it’s nice and flat, level and true, I attach a piece of 3/4″ plywood with screws. All the while, I’m still gauging the flatness and shimming where needed to keep it just right.
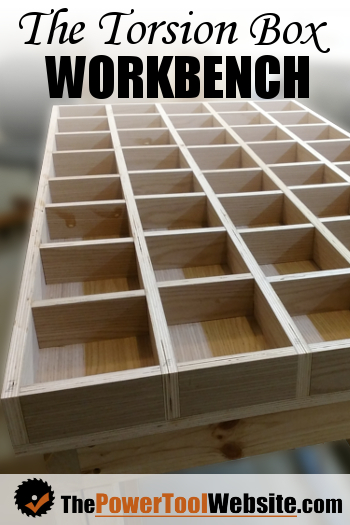
I then take the remaining plywood I have and cut it into 2-1/2″ strips on the table saw. These will build my internal grid structure, which is where the rigidity from this design comes from.
I cut 6 strips down to the same length as the workbench top, then the remaining is cut into short pieces to fill in across the grain, the short distance across the top. These will fit in between the long strips. These will also stagger as to give me clearance to brad nail them in place.
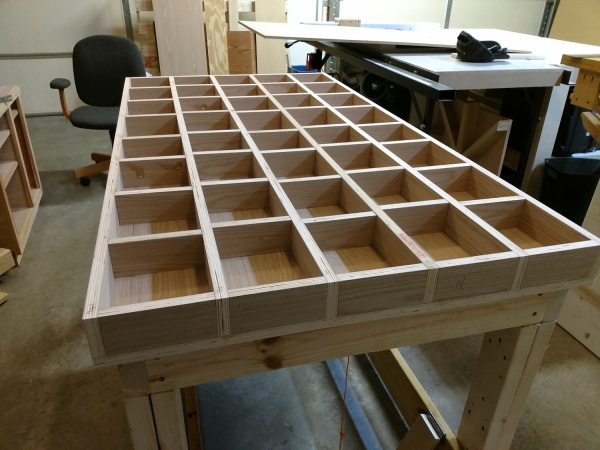
I attach the long strips at both long ends and glue them in place with clamps. Once dry, I just start adding the next section, using clamps where possible, weights where clamps won’t reach, and brad nails into the edges of each short strip of plywood.
I do this until I get all the pieces glued and nailed in place, and here’s what it looks like so far.
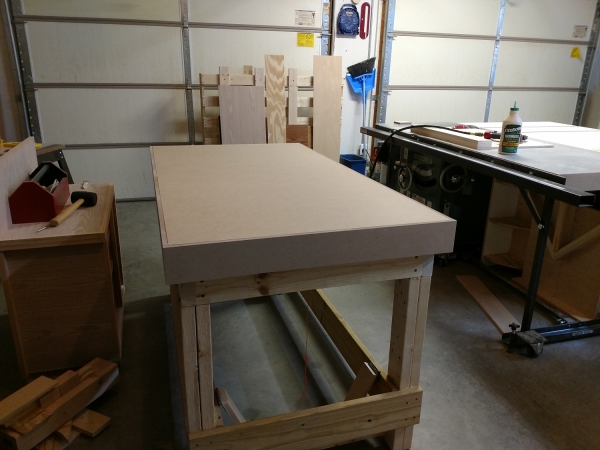
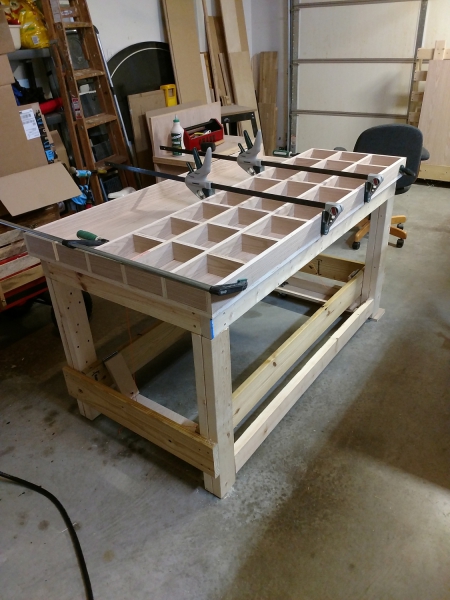
Then I use 1/2″ MDF to finish it up. I cut a piece to size and glue it to the top of the grid structure. I use clamping cauls and weights to get the entire surface evenly clamped down onto the grid. This is very important, as you don’t want any high or low spots due to weak or uneven clamping pressure.
Here’s this step complete, with my boy helping me put away the clamps.
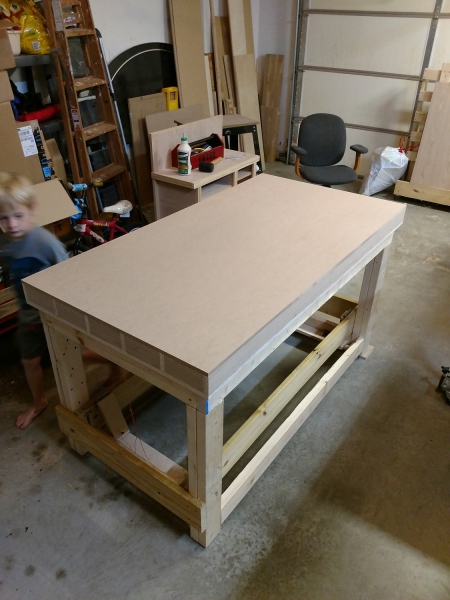
Then I cut strips of the MDF to cover the edges of the entire box. These strips will protrude 1/8″ above the box as it is, in order to hold in place a sheet of hardboard.
The MDF strips are glued on and I add sealer to them. This is to help reduce these edges from soaking up any spills and swelling. MDF does not like moisture at its edges.
Then I cut hardboard to fit down inside the edging. This creates a durable top layer that can be replaced if damaged.
Conclusion
This was a fun project that has really benefited me well. Not only do I have a mobile assembly table, I now know that when I’m setting up a nerve-racking glue up, I’m at least confident that the surface I’m referencing the wood pieces on is truly flat. This is kind of a big deal.
Plus, I made the final height of this bench the same height as my table saw, that way it can double as a mobile infeed table, which is really handy when feeding large sheets of plywood.
Be sure to sign up below to get projects, plans, and woodworking tips straight to your inbox!
Related:
How To Handle and Break Down Sheet Material
What is MDF and How To Use It In Your Woodworking
9 Great Wood Shop Projects To Up Your Game