A good miter joint is a beautiful thing. If done right, the wood appears to flawlessly wrap around each corner. But this effect only works if you do it right.

I want to show you my methods for how to cut perfect miters every time. The following are some key points you should consider when doing miter joints.
- If you’re doing a single corner, or even furniture base molding, the joints are more forgiving. If you are not dead on accurate, chances are no one would notice.
- Perfection is needed when mitering boards that will lay flat and create a rectangle or square by using four joints together. Think picture frame or a framed table top.
- Any error from a perfect 45 degrees gets compounded together 8 times, so by the time you get all four pieces lined up for your frame, there would be a noticeable gap.
- But not only is your angle of cut a critical part of cutting perfect miters. When doing something like a picture frame, each pair of opposite boards must be the exact same length. That’s where using stop blocks is critical to make sure you are consistent.
- And finally, you also want to make sure you’ve got a nice sharp blade. A dull blade does not leave a clean and flat cut consistently.
Using a Table Saw Sled
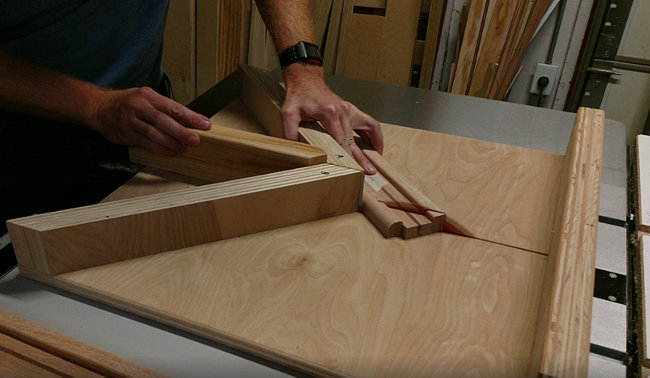
If you have the time and the material to build yourself a good miter table saw sled, this is by far the most accurate and repeatable method to cut perfect miters every time.
It will take you some time initially to build the sled, but when it’s done you’ll have a quick and easy miter cutting method.
UPDATE – I’ve since built a smaller, simpler version of the miter sled shown above. Check it out here.
What makes the miter sled so great is it’s continual accuracy.
You don’t have to set anything up and fine-tune your cuts in order to sneak up on a good miter joint.
You just set the sled on the table saw and make your cuts.
The trick is having an exact 90 degree fence built into your miter sled.
That way even if when mounting the fence, it’s not perfectly 45 to the blade, the other side of the fence will make up the difference.
That means you can use a framing square to square up the fences when attaching them to the base.
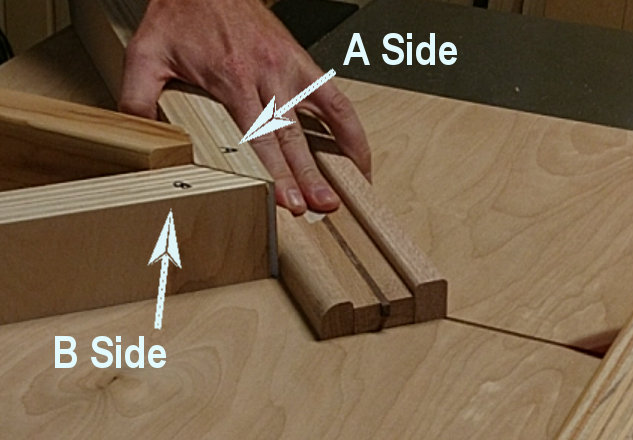
To illustrate this in use, if the left fence is side A, and the right fence is side B, then every miter joint should be made of a piece cut on side a, matched to a piece cut on side B.
One trick I use is to just alternate every board, and I keep track of this with the piece of masking tape.
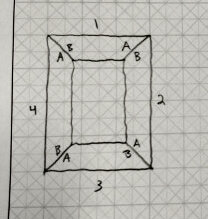
Also remember a key part to perfect miters is also having opposite sides of your frame exactly the same length.
So in the diagram above, side 1 and 3 must be the same, and also sides 2 and 4 must match.
This is done with stop blocks on your miter sled.
First go through and make all the ‘A’ cuts on each of the 4 boards.
Then hold the board in position for the ‘B’ cut, and secure a stop block against the back end.
Do that for boards 1 and 3, then remove the stop block and do it again for boards 2 and 4.
Using Your Table Saw’s Miter Gauge
If you really don’t cut miters all that often, or you just don’t want to go to the trouble of building a dedicated miter sled, you can still cut perfect miters by using your table saw’s miter gauge.
I would recommend attaching an extended fence to your miter gauge for better board support.
If you make this “auxiliary” fence longer than the pieces you’re cutting, you can easily clamp-on a stop block to make sure opposite sides are the same length.
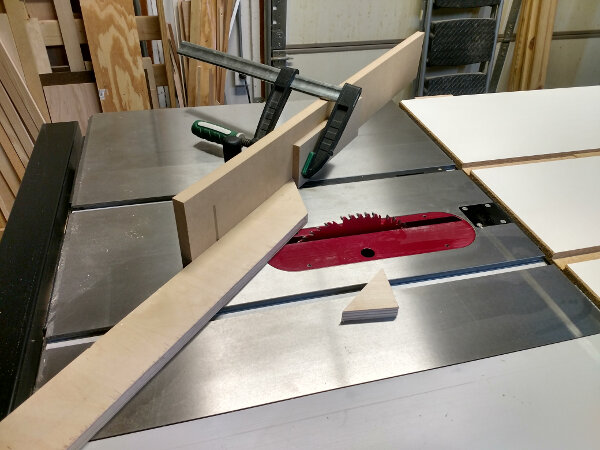
Use your speed square to initially set the angle of the miter gauge.
This may be accurate enough depending on what you’re doing. To get the most from your your miter gauge, calibrate it first – read this.
If you want to cut perfect miters with this set up, you’ll want to do some test cuts first.
Picture Frame Test Method – Go ahead and cut one end off at this angle from a ~2′ piece of scrap, which should be 2 or 3 inches wide.
Now set your stop block up and make 4 identical miter cuts against the stop block, flipping the board each time.
Put the pieces together like a picture frame, and check for gaps.
If the pieces don’t lay easily together without any gaps, make minor adjustments to the angle and test again.
Once you get this angle just right for cutting perfect miters, adjust your miter gauge stop bolt so you can easily get back to this angle next time.
Now you’re ready to make your final miter cuts using this miter gauge setup.
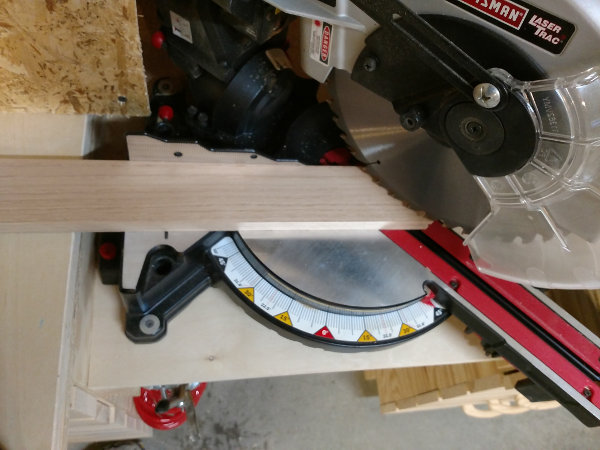
Using Your Miter Saw To Cut Perfect Miters
The miter saw is a fast method with very little set up time, assuming the 45 degree positive stop detent is just right.
To test this first, make sure to use a stop block so all the cuts are the same length, then make 4 identical pieces.
Lay them out like a picture frame and check for gaps (the same Picture Frame method as above).
If there are gaps, make slight adjustments until you get it just right.
There aren’t any great tricks to making the miter saw work perfectly, so it really comes down to having scrap boards available you can make your test cuts on while you initially fine tune the miter angle until it’s just right for cutting perfect miters.
Ideally you would want to make these adjustments and get your miter saw tuned so the positive stop for 45 degrees is dead-on accurate.
If you get this done, you can absolutely get consistently perfect miters using your miter saw.
Be aware though, doing this with your miter saw may not be as clean of a cut as your table saw.
I always seem to get more tearout on the back end of the cut when using the miter saw.
One way to combat this is to wrap the board right where the saw kerf will be with masking tape.
Also a zero-clearance throat plate for you miter saw can help.
If you’re in the market for a new miter saw, you should check out my guide on miter saws here.
Which Miter Cutting Method Is The Best?
It really isn’t a one-size-fits-all answer.
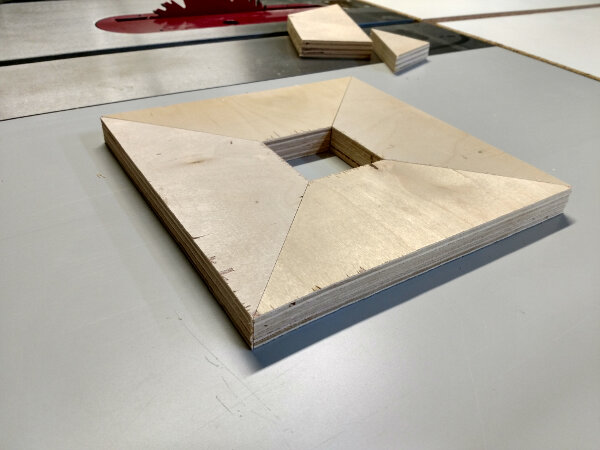
If you’re laying the boards down flat and cutting your miters, like with picture frame building, the table saw miter sled works great.
This also works well for small, framed table tops.
If you’re cutting stock that is a mitered corner that wraps, like the base molding I did for my desk, the sled doesn’t really work for that.
Instead, you could make another sled for doing bevel cuts, then you could lay the piece down flat and cut the bevels on a sled, but honestly I usually just use my miter saw for this kind of cut.
For anything you need extreme accuracy and a really clean cut, I still prefer the table saw, even if the piece is too large for the miter sled.
That’s when I use the miter gauge with a fence.
I’ll do multiple test cuts using the picture frame testing method above, until I get it perfect. Then I’ll make my final cuts.
If you’re doing finish work like door and window casings, baseboard, and crown molding, you really should use your miter saw.
It’s made for these kinds of projects and as long as you get your positive stop detents on the miter saw set up accurately, set up time is really fast and the cuts are consistent and very accurate.
How To Dress Up An Imperfect Miter
There are few reasons your miter joint may not be lined up perfectly.
This can happen even if you get the 45 degree cut spot on.
Usually if you still can’t get the miter joint to close perfectly, it’s because you either cut one piece too long (or too short), or the blade itself was not perpindicular (90 degrees) from the base.
That would essentially make it a compound angle cut, even though you didn’t mean to.
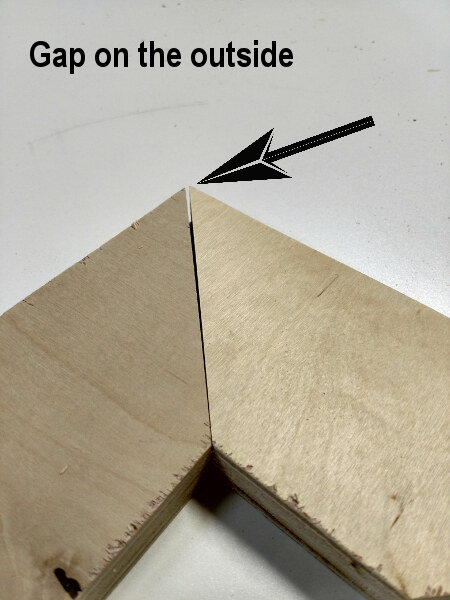
If you cut a piece too long, the miter joint would look something like this –
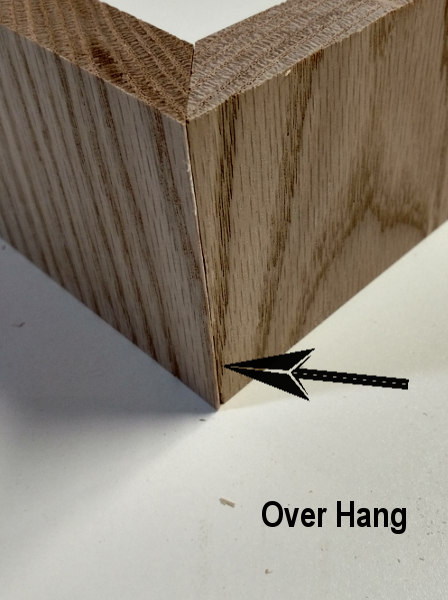
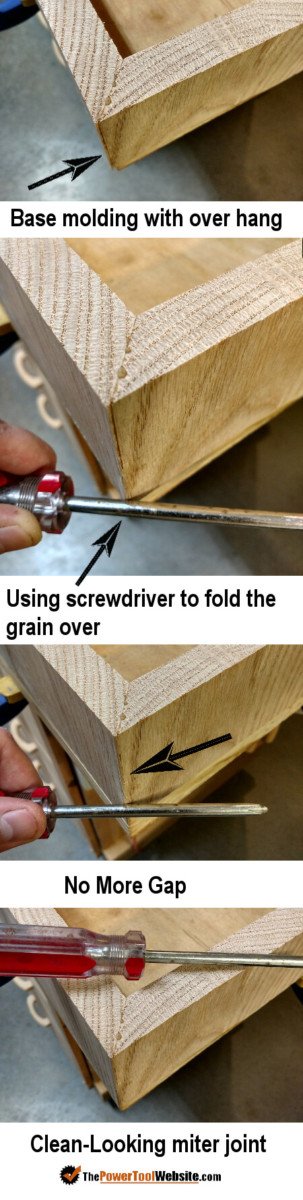
Fix it with steel – a quick fix is to run a screwdriver along the corner to fold over the grain of the longer piece.
This is fine if it’s a small discrepancy and still leaves a clean looking joint. I picked up this trick from The Family Handyman.
If the blade was in some way out of alignment, your joint may look like this –
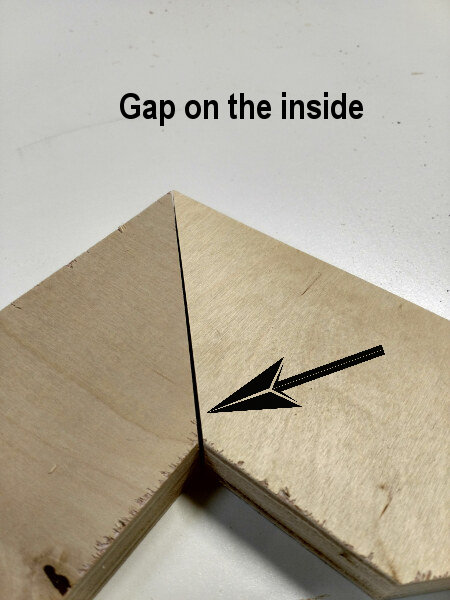
Use sawdust and glue to fill the gap – if you don’t want to fine tune the saw and recut the pieces, you can likely get away with just filling the gap.
I would suggest using biscuit joinery since the gapped joint won’t have much wood-to-wood bonding otherwise.
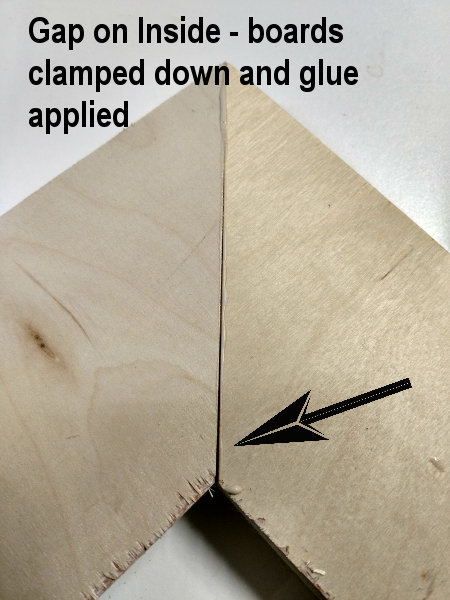
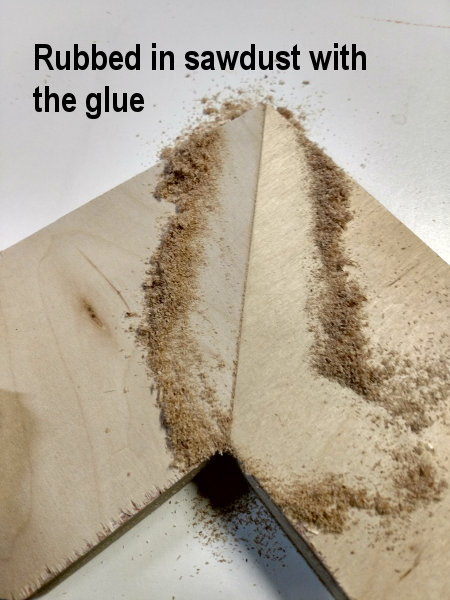
Then use plenty of glue around the biscuit and once it’s clamped, rub in saw dust from the same wood.
This mixes with the glue and creates a matching wood filler to close the gap.
And that’s how I cut perfect miters every time. I either get it just right, or I get it close enough and I dress it up while joining.
NEXT >> Miter joinery practice with this simple picture frame project