You’re about to learn how to build cabinet shelves using plywood and a very simple process. These shelves work for any kind of cabinetry, including kitchen islands, base cabinets, hanging cabinets, etc…
Plywood makes great shelves, because it’s very sturdy and stable. Plywood won’t shrink and expand like regular solid wood, making it ideal for not only the cabinet carcass itself, but the shelving within.
You can build these using cheaper sanded pine plywood, expensive pre-finished hardwood plywood, or anything in between. Read this to understand the different grades of plywood.
And if you’re more technical you may enjoy this wiki page on plywood.
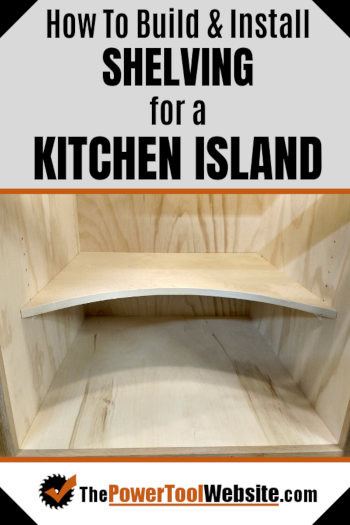
Here are the 2 types of shelves I’ll be building in this article:

I’ll be using standard shelving pins you can get at any home store to allow for height adjustment of each shelf.
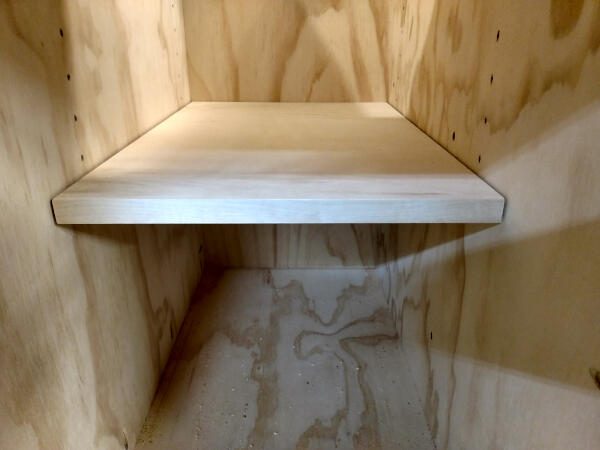
I’m making a single shelf in each of the 3 cabinets.
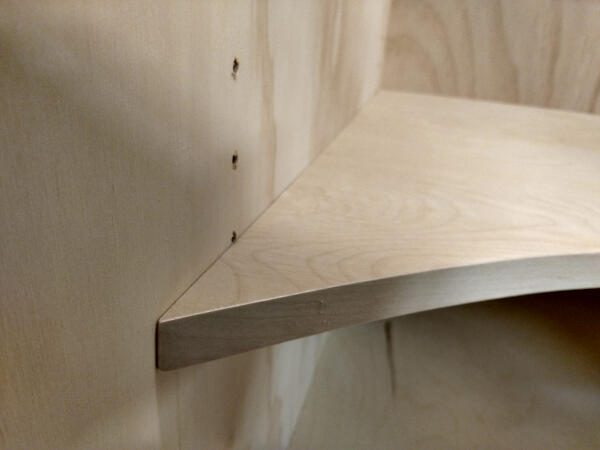
The middle wide cabinet has a curved front.
Because plywood’s edge is not attractive, or meant to be left exposed on finished furniture, I’ll add a veneered edge banding to the front edge of each shelf, and I’ll show you exactly how to do that, and what to use.
How to Build Cabinet Shelves
First, cut the narrow cabinets’ shelves an sand them smooth. Do not sand very much on plywood. If you do, you may sand through the top ply exposing the glue beneath it.
There is not much to sizing a standard rectangle shelf. Depending on the type of shelving pins you’re using, you may need to cut the shelf an 1/8″ or so narrower:

You can always trim a bit away to get them to fit just right, once you’ve installed your pin holes and have the shelf pins installed. I’ll cover that below.
To get the dimensions just right, focus on accuracy: 5 Ways To Improve Accuracy.
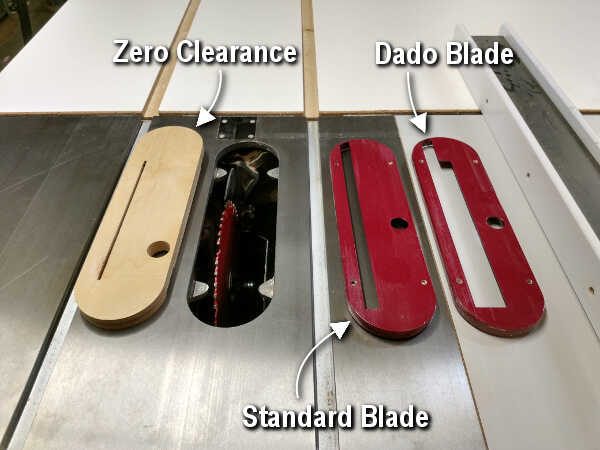
When cutting across the grain on plywood, it’s best to use a zero-clearance throat plate. Otherwise, the bottom edge of the plywood may splinter really bad.
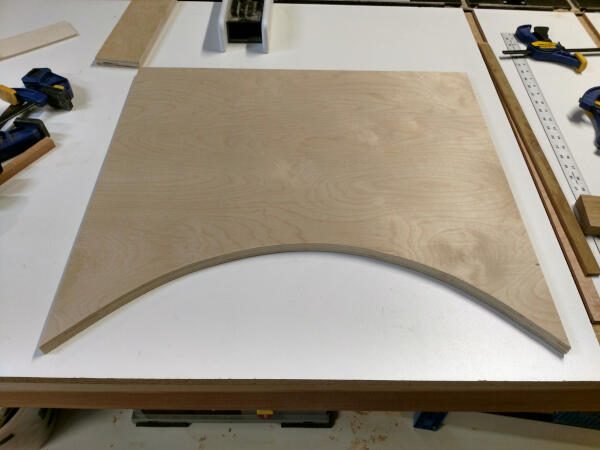
Building a Curved Cabinet Shelf
If you have a cabinet that will normally be exposed, like the middle cabinet on my island project, you may want the shelf to be a little more ‘interesting’.
So I’m adding a simple curve to the front of the shelf.
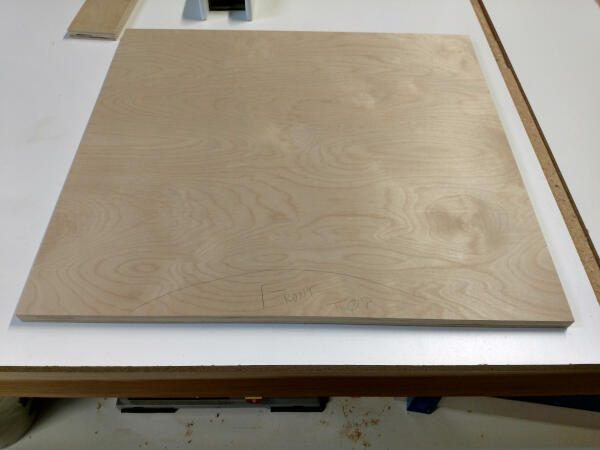
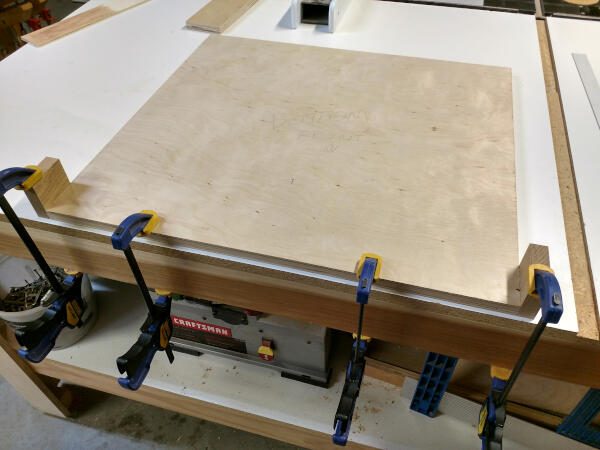
First, I create my shelf with standard rectangular dimensions. I’ve also marked a curved line (that’s just for reference, it’s not my cut line), so I’ll know which side I’m cutting.
I have this one fitting the cabinet a little more tightly than the narrow ones. Since this shelf will be exposed, I prefer not to have the gap on either side:
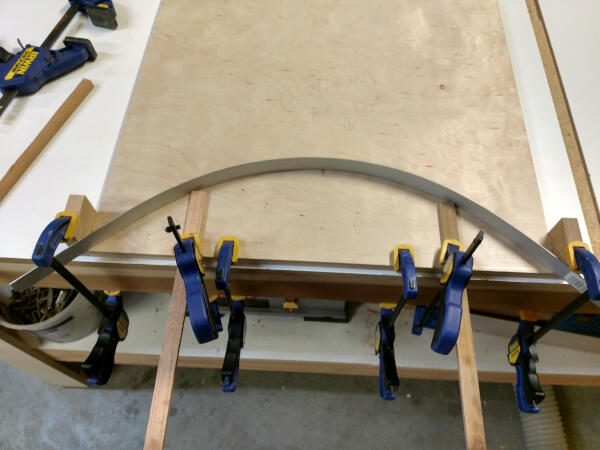
To make an accurate curve on this large piece of plywood, I’ll use an aluminum 36″ ruler.
I’ll also flip the piece over and work from the back. This is because I’ll be using a jig saw to make the cut, and the saw leaves a cleaner finish on the bottom of the work piece.
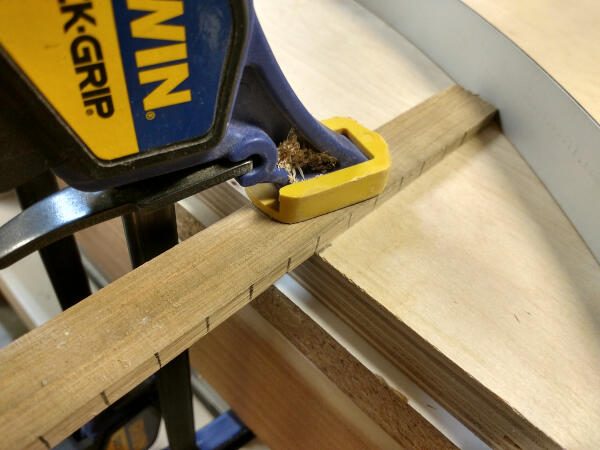
So once flipped over, clamp the board in place at the edge of your work bench.
Also clamp a block of wood at each corner as shown here.
Now as you can see, an aluminum ruler will curve very nicely from one corner to the other.

But for a deeper curve, that remains accurate, you’ll want to use strips of wood clamped in place to hold the ruler just right.
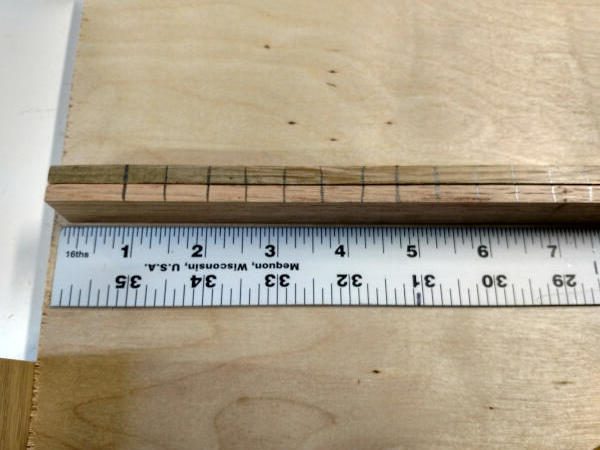
I’ve made a mark 5″ in from each end of the board, to align my 2 holding strips in place.
I’ve also made marks every half inch across each of these strips of scrap wood, to make sure they are both clamped the same.
Now you can make your mark with a pencil directly on the bottom surface of the plywood, and remove the ruler to make sure you can see the entire mark.
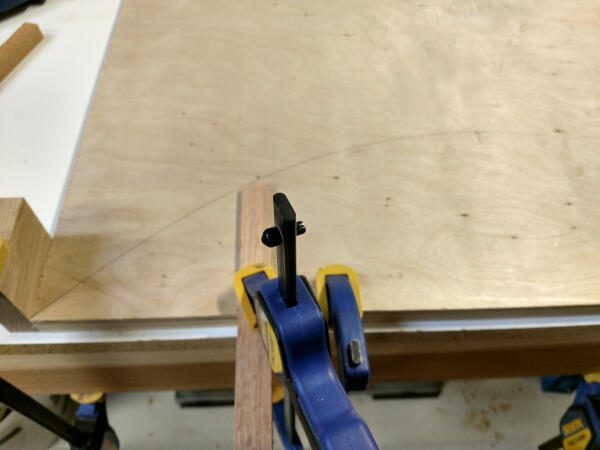
Now you can reclamp the board in place for the cut, and make the cut using your jig saw. Make the cut slow and steady, follow your line the best you can.
Adding Veneer Edge Banding to Plywood
How to build cabinet shelves with veneered glue-on edge banding to make the plywood edges look factory…

As I mentioned above, plywood edging is not meant to be left exposed. It splinters, and it’s generelly just, well, ugly (for finished interior furniture anyway. Shop furniture is different).
I use this edge banding here.
It comes with an adhesive back that must be heated up to stick, and for that you’ll want to use an iron.
You can easily cut the edge banding to length with some diagonal cutters, or hefty scissors. Cut it an inch or so too long, you can trim the ends away later.
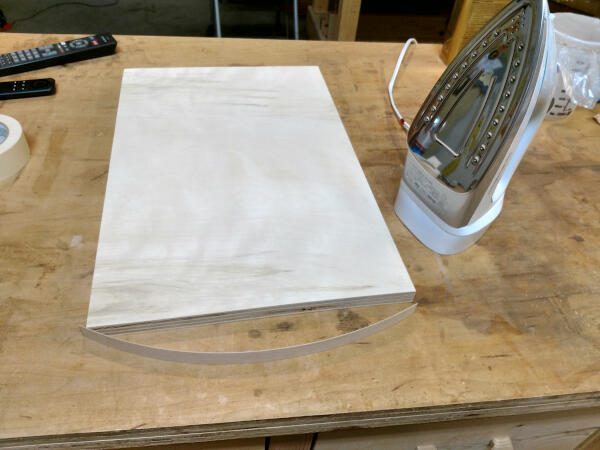
Holding the edge banding in place, you can tape part of it to the front edge of the shelf.
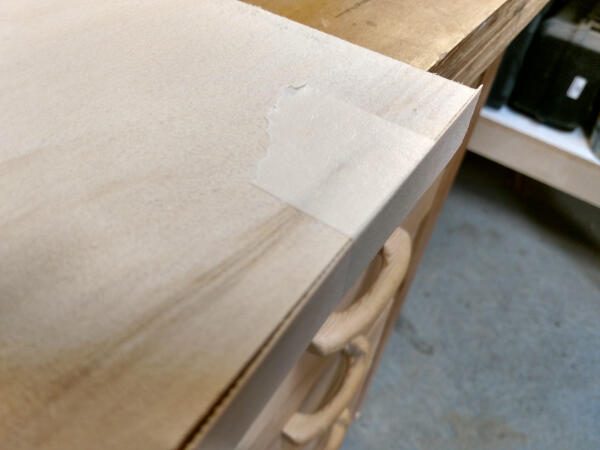
Then holding the other edge in place, start running the iron (at its medium or slightly higher heat setting) directly on the veneer.
Running it back and forth over a 6 inch section or so, do this for 15 or 20 seconds. If you start to see the wood darken, that’s plenty hot. It will eventually burn, so watch for that.
While it’s still hot, take a block of wood and rub hard along the heated area of the veneer. This presses the melted glue into the plywood.
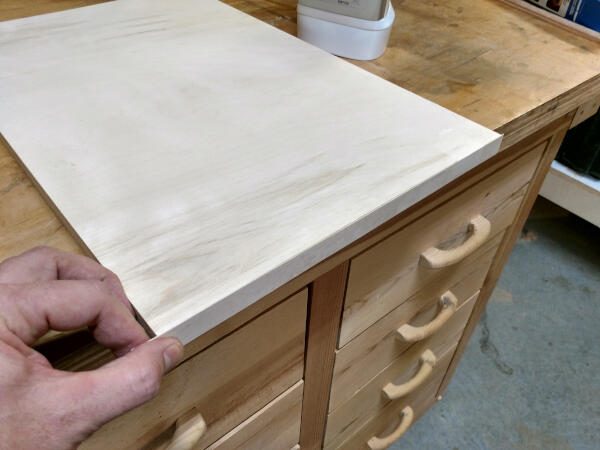
With one section complete, the veneer will stay in place without the masking tape.
So remove the tape and finish the process on the rest of the veneer.
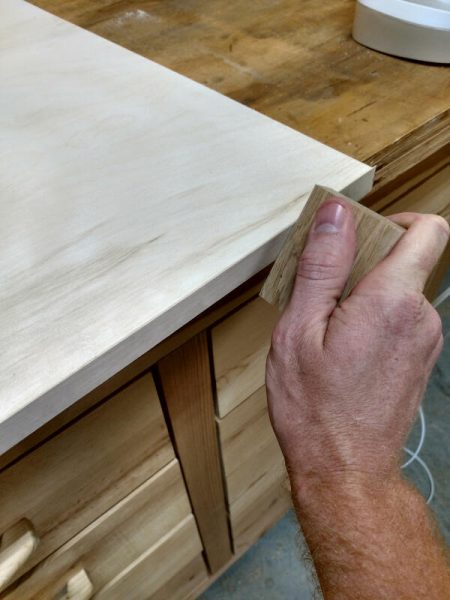
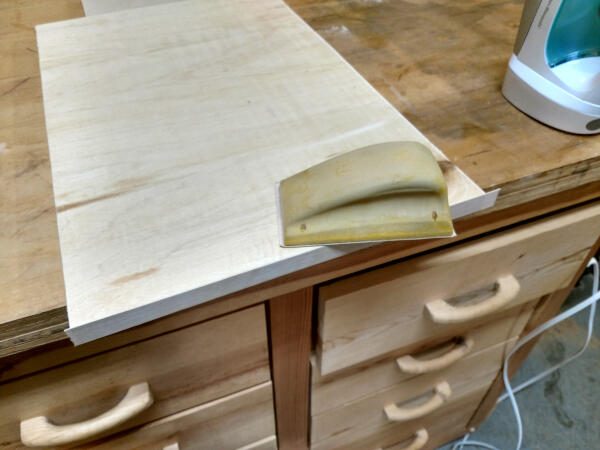
Then sand the veneer smooth on the top and the bottom, so it’s flush with the surface of the plywood.

Then any excess that’s hanging off can easily be trimmed away with a utility blade.
It works best to score the veneer over and over until the blade cuts through completely.


See my complete guide to Veneer Edge Banding here
Shelf Pin Holes for Cabinet Shelves
How to build cabinet shelves in a way so you can adjust their height, just like with professionally made cabinets.
For this process you’ll want a decent shelf pin jig, I use the Kreg version you can find here.
It’s very simple to set up and super accurate.
Below you can see I’ve got a narrow cabinet laying on its side. As you can see, we don’t want the shelving pin holes near the bottom like this:

So get a piece of wood as a spacer. This block of scrap is about 8 inches long, and I’ll use it to secure the shelf pin jig in place at each location I use it.

Be sure you use the same spacers and orientation on each of the 4 locations used for any given shelf.
With the pin jig oriented like it is above, that puts the holes about 2-1/2″ away from the back of the cabinet. Go ahead and drill the holes at this location now.
To keep consistent, I’ll need to know where the front of the shelf will be, then I’ll line the jig up so the front pin holes will also be 2-1/2″ from the front edge of the shelf.
So below, you can see I’ve laid the shelf on the side wall, which I’ll use to position my framing square.

Now using the square in combination with the 8″ block of wood, I can hold the pin jig in place as I’ve got here:


From there, you just repeat the process on the other side of the cabinet, and each cabinet you want shelves in.
That wraps up how to build cabinet shelves for a kitchen island, or any cabinet for that matter. Here you’ll find the other articles in the tutorial series:
- How to Build Base Cabinets For A Kitchen Island
- How to Build Shelves For A Kitchen Island (you are here)
- How to Build Dovetail Drawers
- Kitchen Island Trim For A Rustic Island
- How to Build Cabinet Doors
Be sure to sign up below to get updates on this project, free templates, plans, etc., directly to your inbox.